Bathroom Renovation: Built-In Linen Closet

After the vanity was made and installed, I started to build the linen closet. My dad had made a wall cabinet and underneath it sat a hamper that he made as well. Of course both were made out of poplar. My mom wanted to keep the existing cabinet but she wanted it to be painted. I had an idea to add onto the existing wall cabinet to make it a built-in linen closet. My mom really liked this idea as it would give her more storage. Plus the cabinet would have a built-in hamper too. So I started to take some measurements and came up with a design.

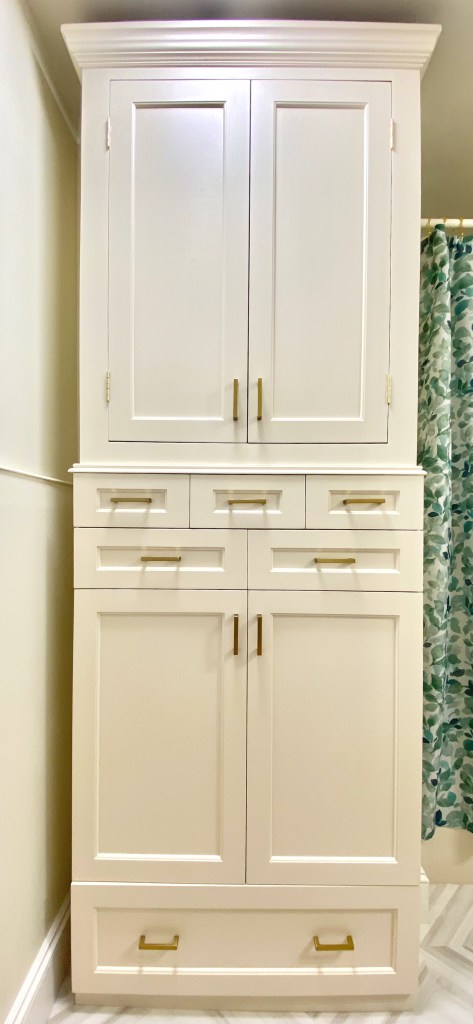
I wanted the linen closet to have a pull down hamper. I looked at various types of hardware to come up with a plan. I built the case of the cabinet out of poplar since the upper cabinet was poplar. The hamper was the starting point for my design. I knew where in the cabinet I wanted the hamper to be placed. Not too low or too high or too tall. I wanted it to be big enough but easy to access.

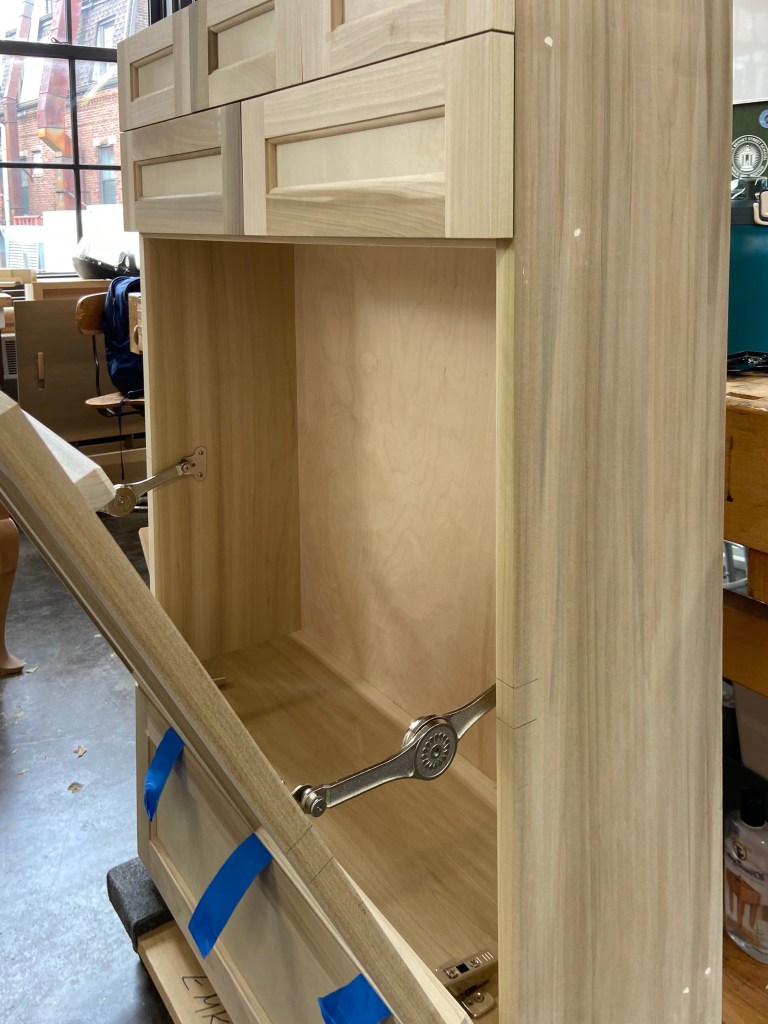
After I placed the position of the hamper in my drawing I was having trouble figuring out the layout of the drawers. Luckily my friend Denise gave me some much needed design advice for the drawer layout. She suggested starting with a row of 2 drawers, followed by a row of 3 drawers, next the hamper and lastly a taller single bottom drawer.

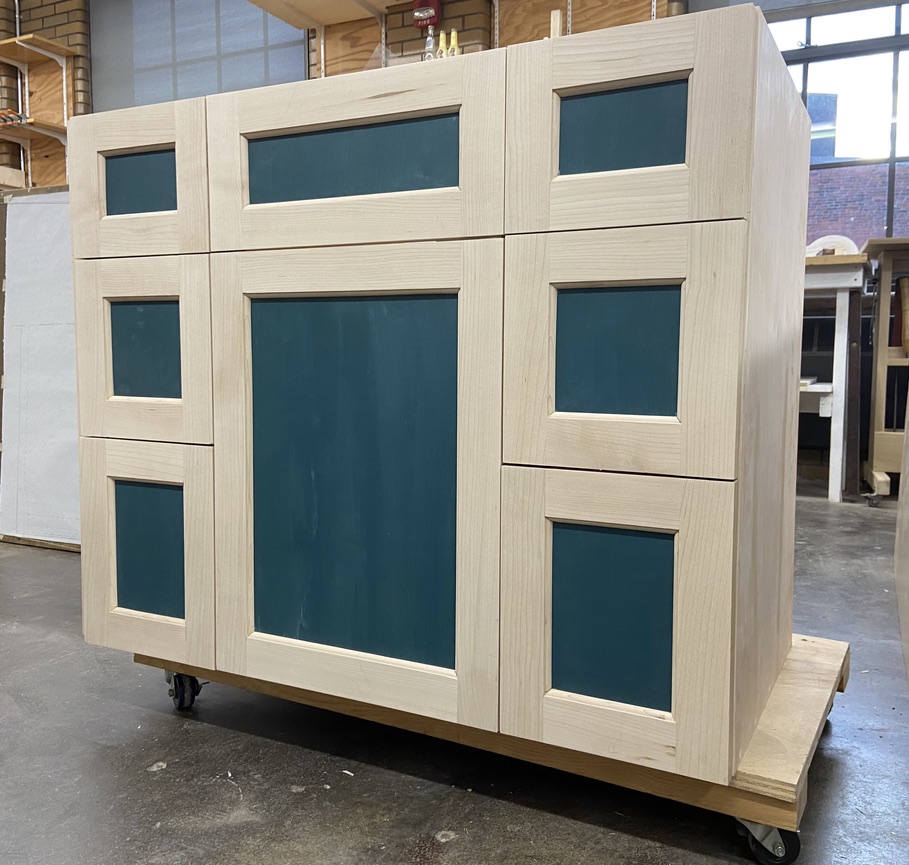
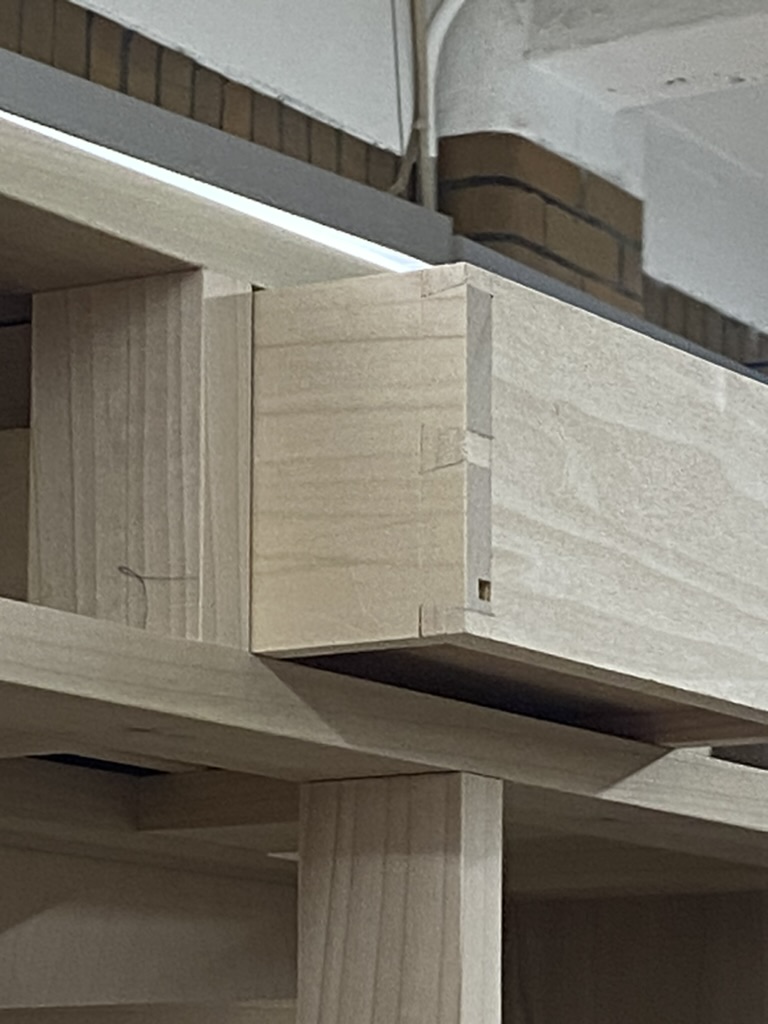
After the layout of the drawers was determined, I added the drawer dividers. Since I wanted the linen closet to have a similar look to the vanity I decided to do overlay drawer fronts on the bottom part of the cabinet. Since the cabinet was shallow, the drawers were not deep enough to use soft-close hardware. Because of this I decided to dovetail the drawers.

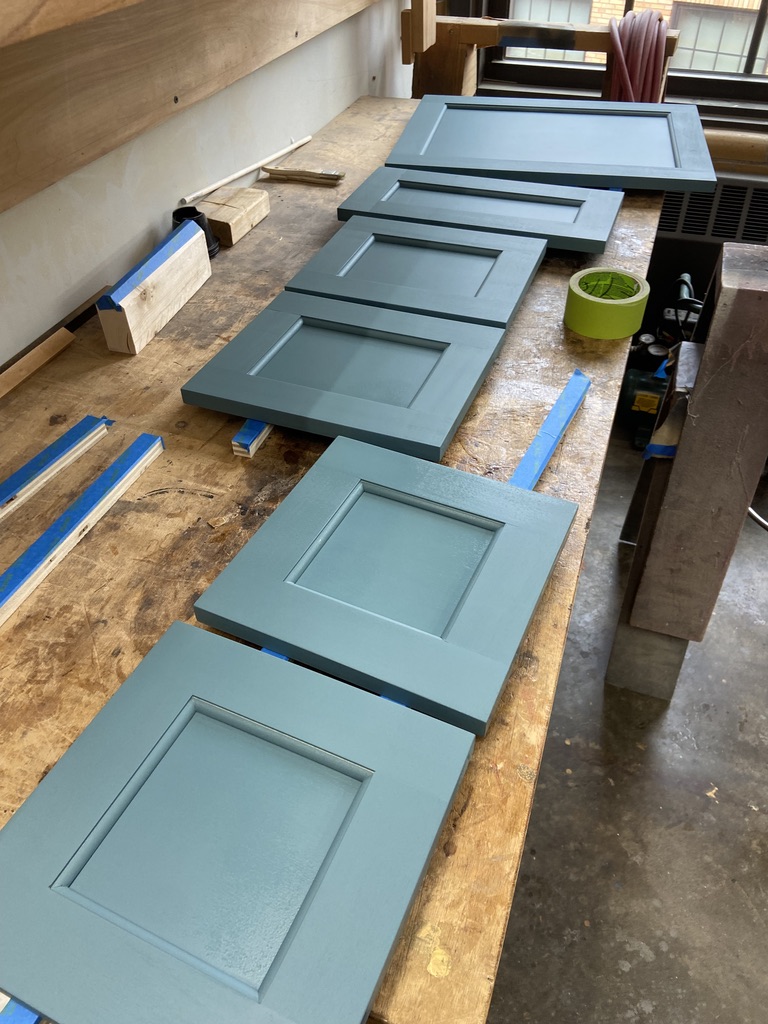
I made the drawer fronts using my go-to Amana cope & stick router bits and painted the panels before gluing up the drawers fronts.

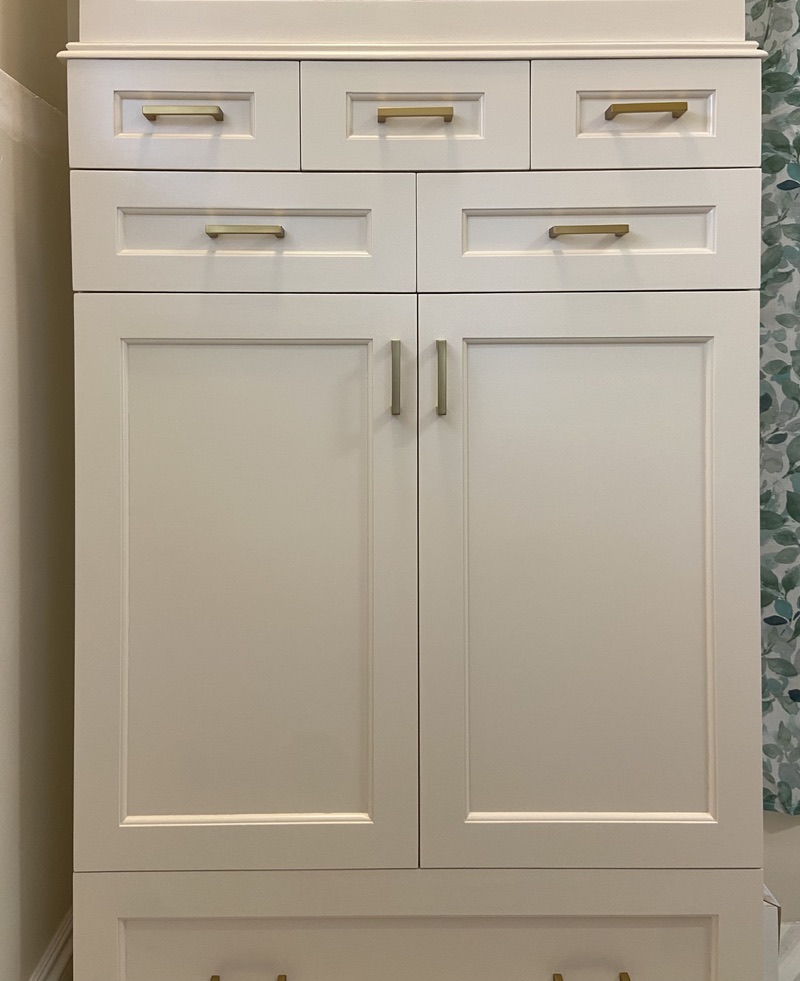
At this point time seemed to get away from me so my friend and old shopmate Matt sprayed the drawer fronts. He is the one who taught me how to spray so I knew they would turn out perfect. The new cabinet and drawer fronts were painted using Benjamin Moore Advance Waterborne Paint in Pale Almond.

I took down the cabinet my dad made to sand and paint that too.

The original wall cabinet had frame and panel doors that slightly overlay the opening. The profile my dad used on his doors was a little different than my go to style. At first I tried to retrofit them by removing the raised panels and cutting down the doors. This did not go well at all so I ended up making new inset doors for the upper cabinet,

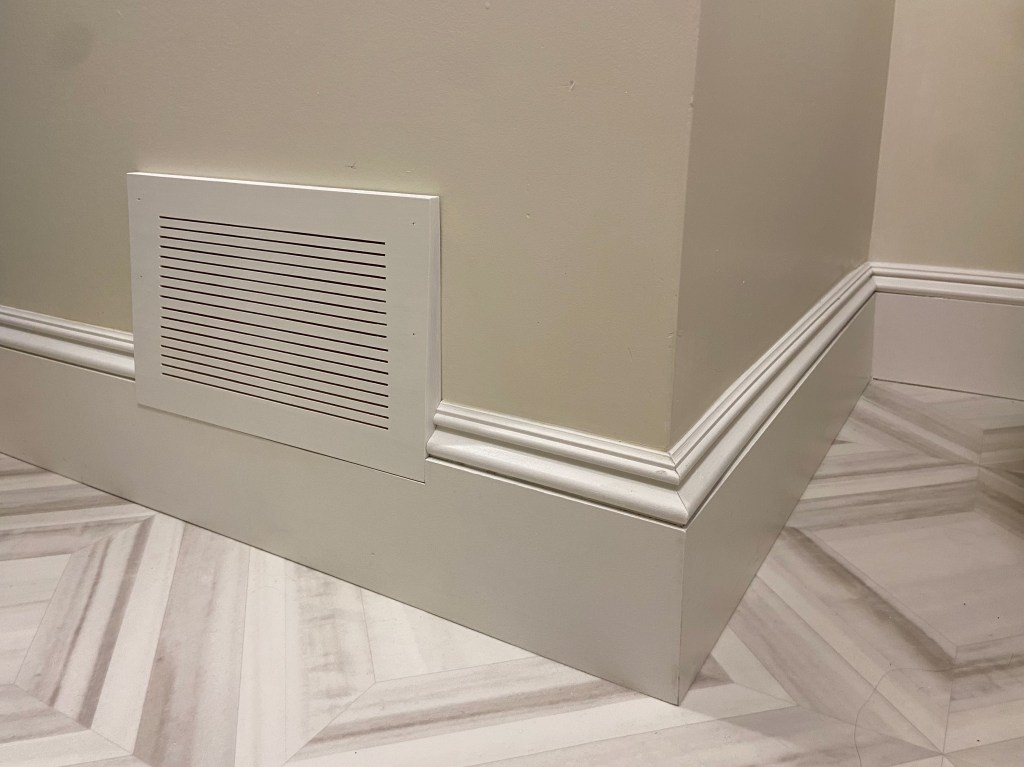
While I was building the cabinet we had a new floor and toilet installed. Next I painted the walls Monterey White by Benjamin Moore and started to install the baseboards. 

The flat stock is 5 inches tall. The flat stock and base cap are from Anderson McQuaid in Cambridge, MA. Their quality and selection are the best. All the trim work was replaced and painted Dove White by Benjamin Moore.

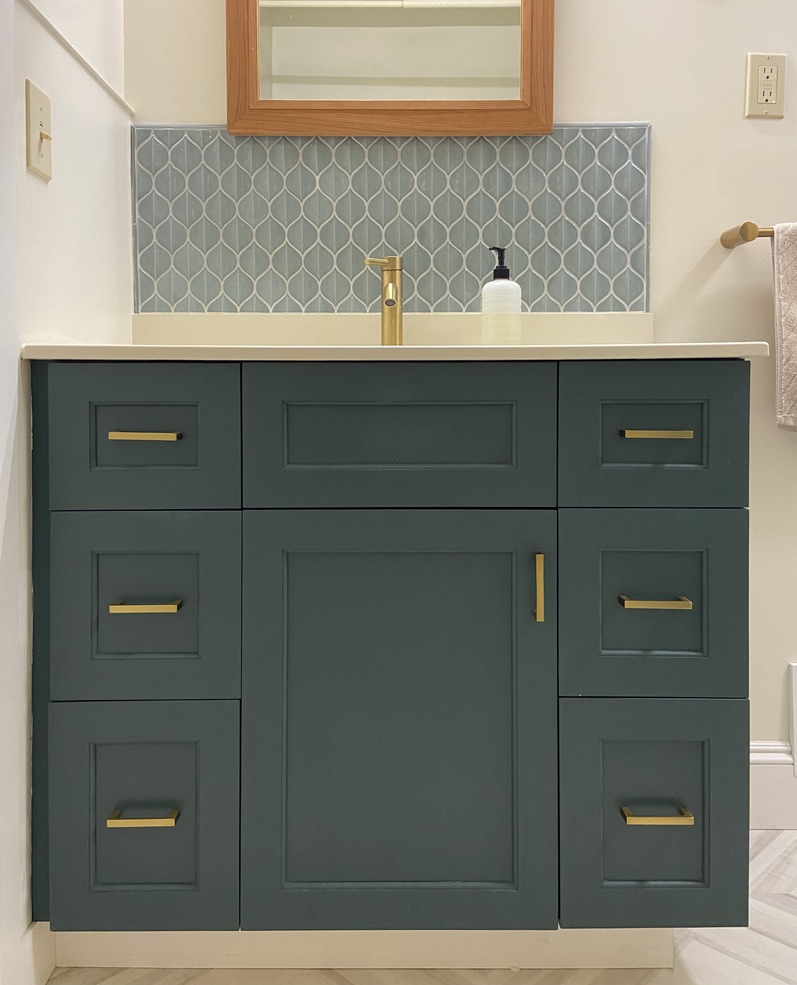
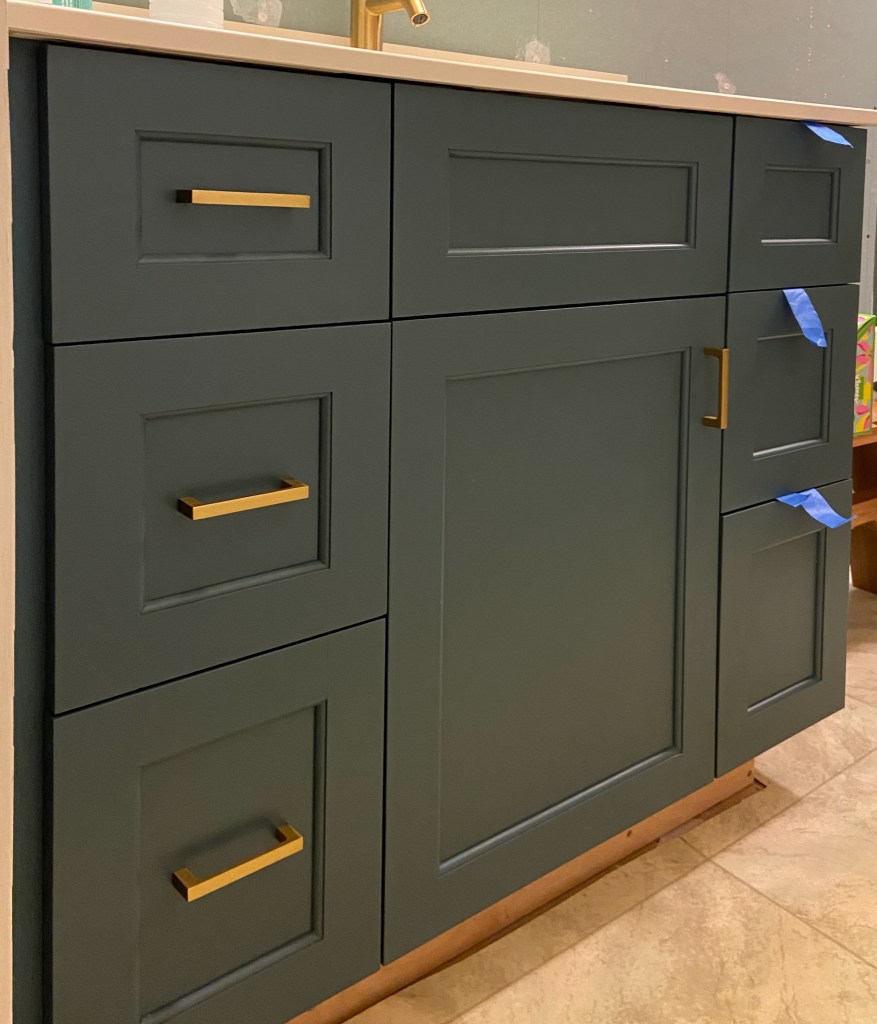
To tie the cabinet back to the vanity I used the same hardware.

I couldn’t be more pleased with how this turned out. It meant a lot to me to add onto the cabinet my dad made over 25 years ago. I know he would have loved this updated look and design, making it our father/daughter built-in linen closet.

Bathroom Renovation: Vanity

Kicking off a new series of posts about a project close to my heart: remodeling the bathroom in my parents’ home where I grew up. Last year, I had the chance to give this space a fresh new look—luckily, my mom was the “client,” so I had plenty of creative freedom. Originally remodeled by my dad almost 25 years ago with natural poplar and a lot of Formica, it was time for an upgrade to honor the past while creating something beautiful and modern for the future.

The design & build of the bathroom started with the vanity. I sourced the countertop, which is Swanstone, then started to draw the cabinet. I wanted the vanity to have as much drawer space and storage as possible but still have room for a waste can (per my client). The design of the drawers and door went through many iterations.

The case is made out of prefinished maple plywood. I made the drawers of the vanity out of poplar that my father had. It was nice to be able to use wood that he had stored away. The drawers and door were installed with Blum hardware.

I used an Amana cope and stick router bit set to make the drawer fronts. I then sprayed the cabinet and drawer fronts with  Olympus Green by Benjamin Moore. 

I installed the vanity over my spring break. I am fortunate that my mom didn’t care that I did the bathroom in stages.

Plant Stand Kits

The plant stands are fun to make and it uses traditional joinery, mortise & tenon and lap joint.

For the 2024 Winter Market at NBSS I decided to make some plant stand kits. It is perfect for someone who is interested in woodworking but does not have the machinery to make the parts themselves or for your favorite plant lover who is handy.

If you received a kit and are interested in knowing how to finish it, you can check out my article Mid-Century Modern Plant Stand. The plant stand fits a 10 inch diameter by 10 inch tall pot. Here is a link to the pot in the image below https://a.co/d/bfNuTb7

Scrappy Table

mahoganyLegDetail
I had a design vision for a small side table and finally was able to build it over the weekend. The best part was that I used wood from my scrap pile.

I knew I wanted the top to be butternut, as I had a piece that was glued up and perfect for my design. The butternut had just the look I was going for. I wanted the base to be a contrasting wood. When I picked out the mahogany, I didn’t know I was going to dye it black. The pieces of mahogany were all from the same project and milled to the same thickness. It was just the right amount and size to make the base. Once I gathered my parts and came up with the table dimensions, it took me 3 hours to build the table.

I finish milled and cut all the base parts to dimension. Next, I cut the mortises and tenons for the base. Before the table base would go together, I needed to notch the stretchers. I did this lap joint (notch) on the table saw using my miter gauge and dado set. I took small cuts, so I could get a perfect fit with no gaps. Then I put the base together and figured out the angle I designed for the legs. I wanted the legs to taper into the stretchers. I made that cut next. I left the angle heavy, so I could hand plane the legs. This allowed me to remove the saw marks, while getting the taper to flow right into the stretchers.

After I had the base assembled, I made a fixture for the bandsaw to cut the top into a circle. After it was cut into a rough circle, I faired the top with a file. By fairing the top, I get a smooth edge with no bumps. Once the top was faired and smoothed, I beveled the edge using my router. This really lightened up the look of the table.

It was really gratifying to see the table come together in such a small amount of time. The sanding and finishing took about twice as long, but it was well worth. I decided to make the base black to highlight some of the dark details in the butternut. I am really happy with the result.

I am going to be raiding my scrap pile again to see if I have pieces for another small table. I think I know just the pieces I want to use.

butternutMahTenons butternutMahFin1

Reclaimed Wood Bench

reclaimedWoodBench

I was given a piece of very thick wood from friends that looked like it was part of a house or barn at some point in its life. I had the reclaimed wood for about a year before coming up with a piece to make with it. I decided to mill the board for the top of a bench. I quickly realized the wood was not wide enough for the bench seat. I decided to rip the wood down its length and leave a slight space between the 2 pieces. The problem was it totally changed the look of the piece. You really couldn’t tell that the 2 pieces were from the same board. I thought about scraping the whole bench. Then I remembered my friends had given me another piece. I milled up the second board but it was fir and not pine like the first board. Since I had already ripped the first board into 2 pieces I decided to put the fir between the pine and really liked the new look. I epoxied the pieces together. I finally achieved the look I was going for after I distressed the milled wood with some old keys. The final piece is reclaimed fir and pine top with solid maple base painted navy blue.